Hugo is a high-performance static site generator written in go. With Hugo, you can create static site and manage them efficiently. You can easily deploy it with GitHub Pages and Cloudflare Pages.
🚀 Install Hugo
🎨 Install Theme
I used hugo-theme-stack, If you want another one, you can browse in here
Start with Hugo-theme-stack-starter template.
Fork it to your repository using Use This Template.
While the original author uses GitHub Pages, I preferred Cloudflare Pages for better performance and access control.

Then, clone it to local.
|
|
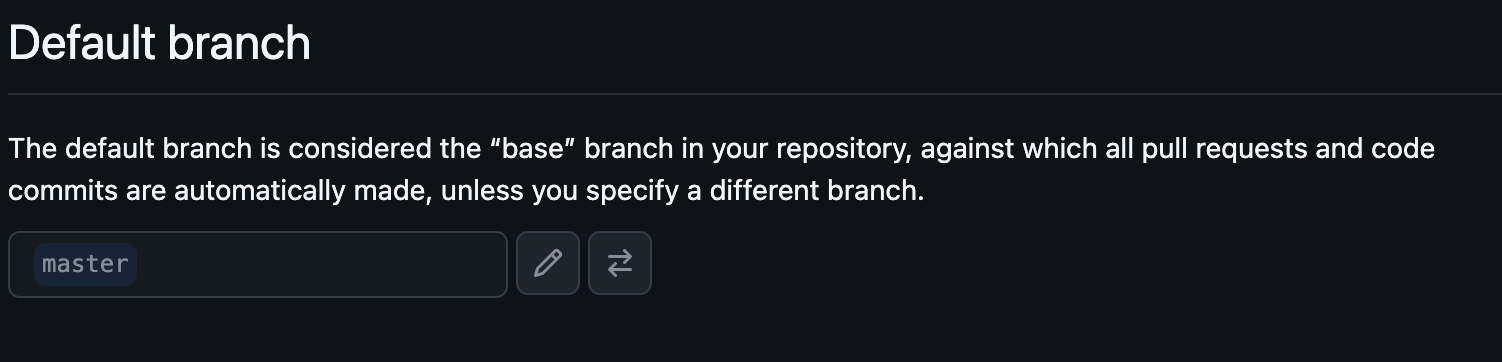
Change branch master to main.
Change our local branch to main, and Change GitHub’s default branch to main.
|
|
Delete master branch.
|
|
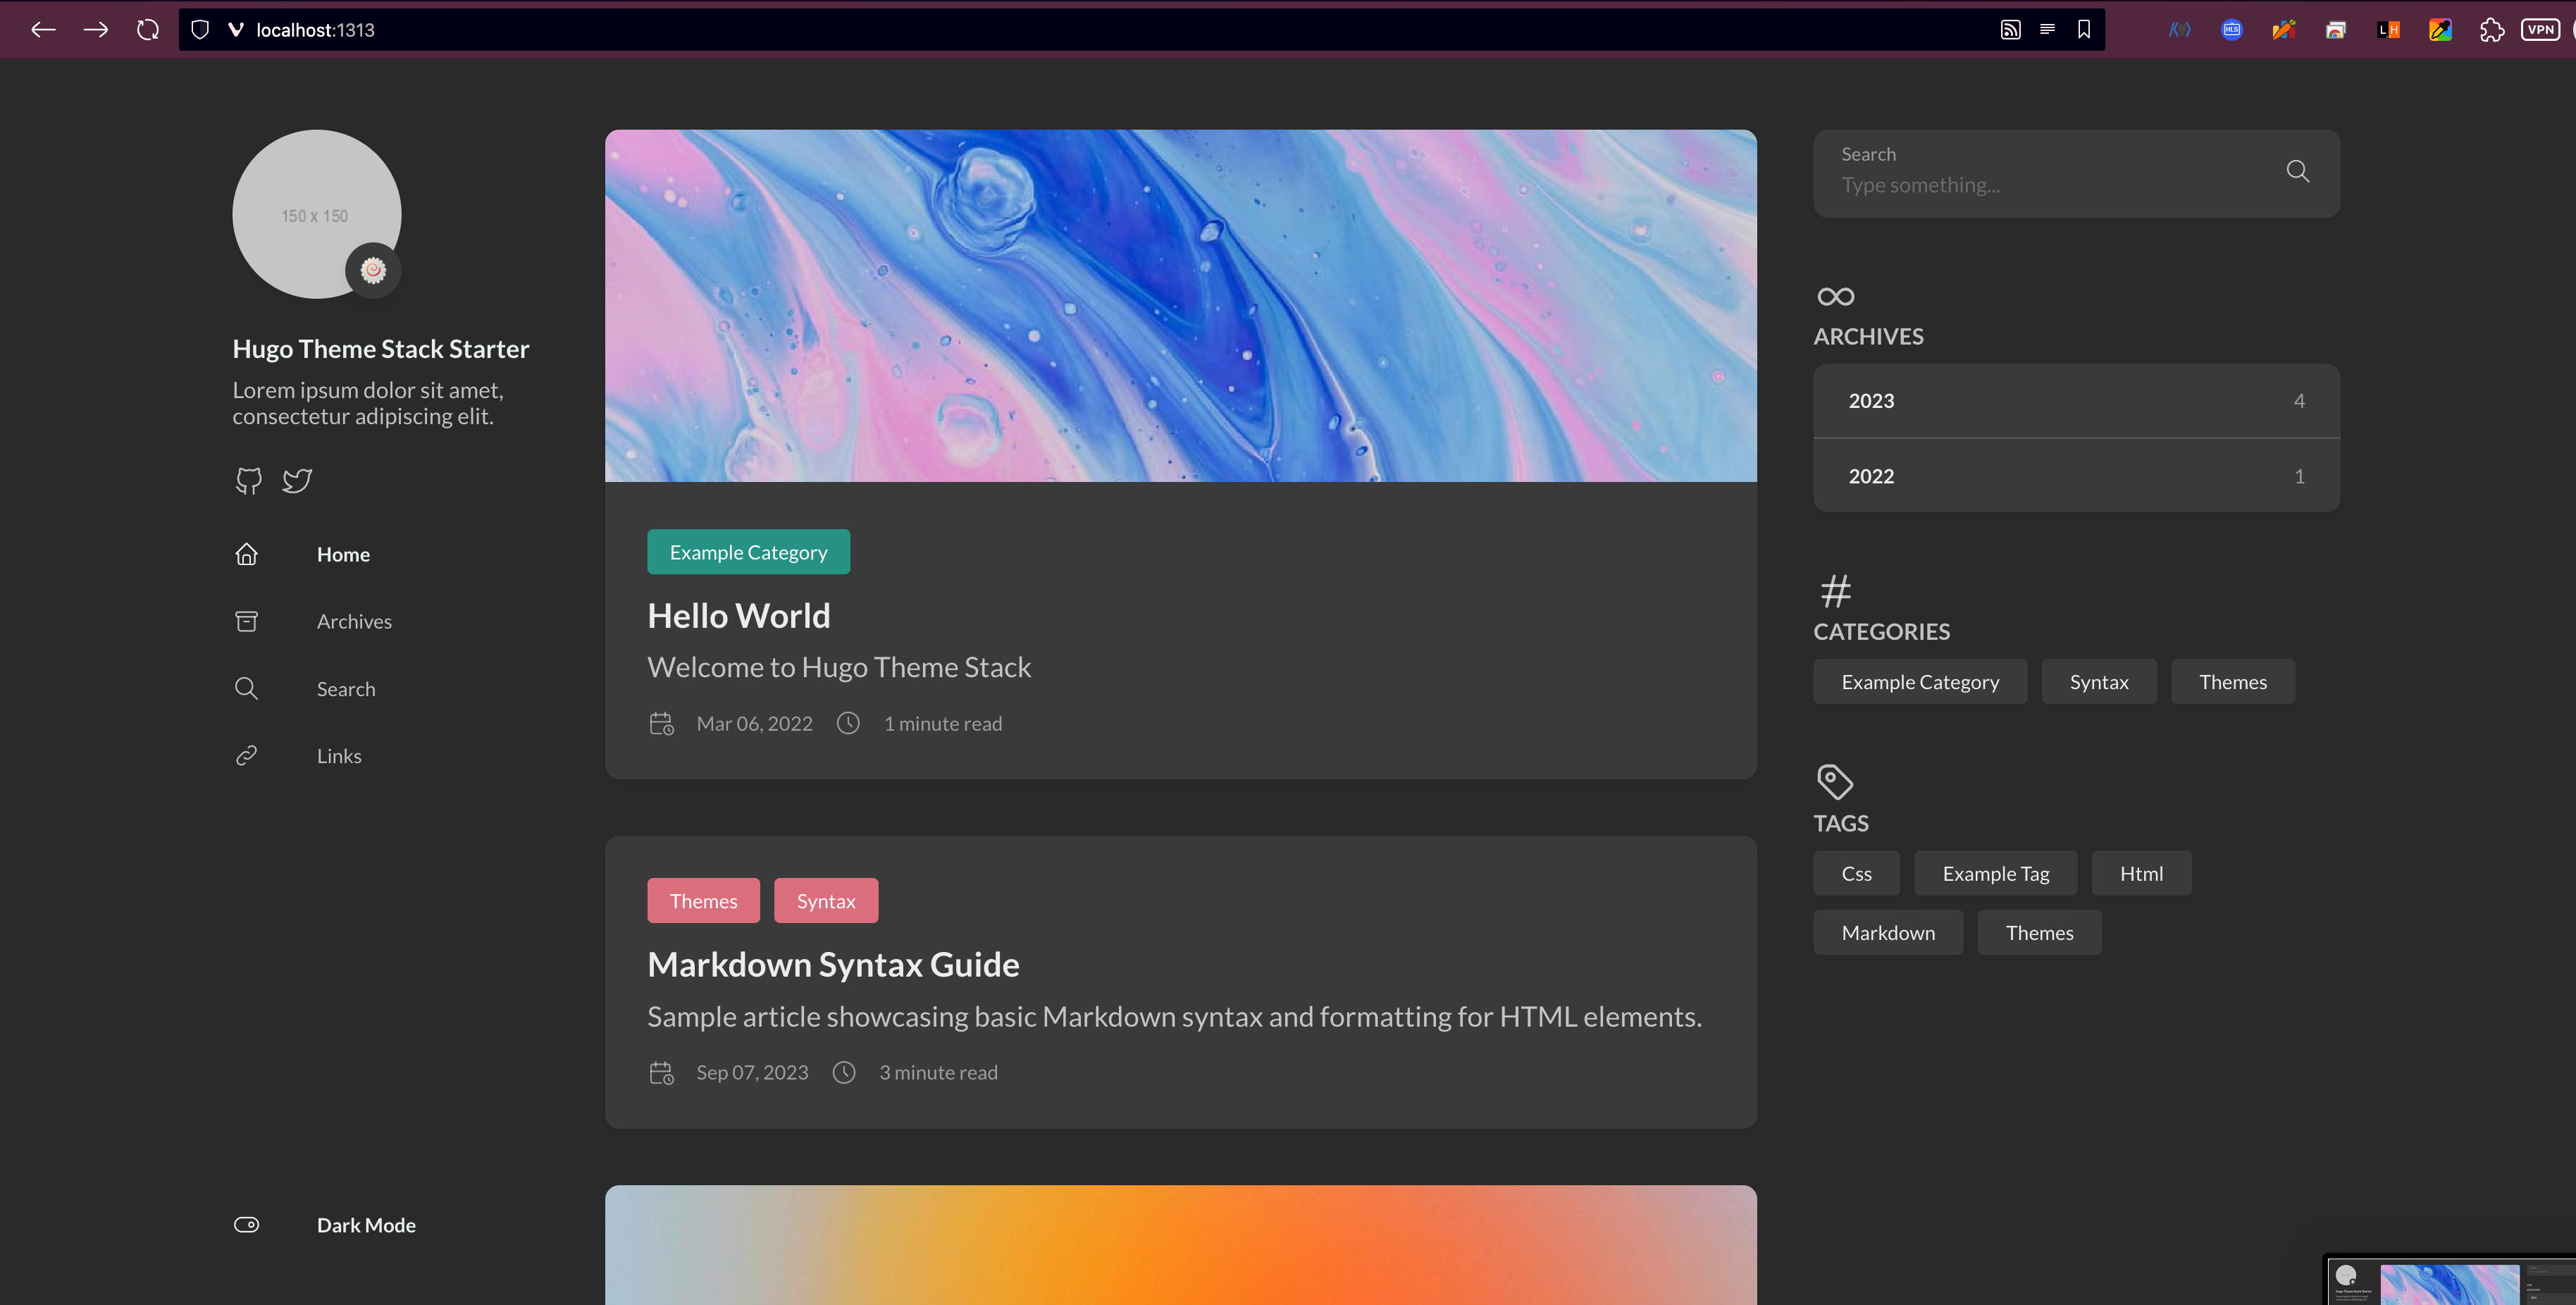
Now, let’s see the first blog page.
Execute this command below and open localhost:1313 in your web browser.
|
|
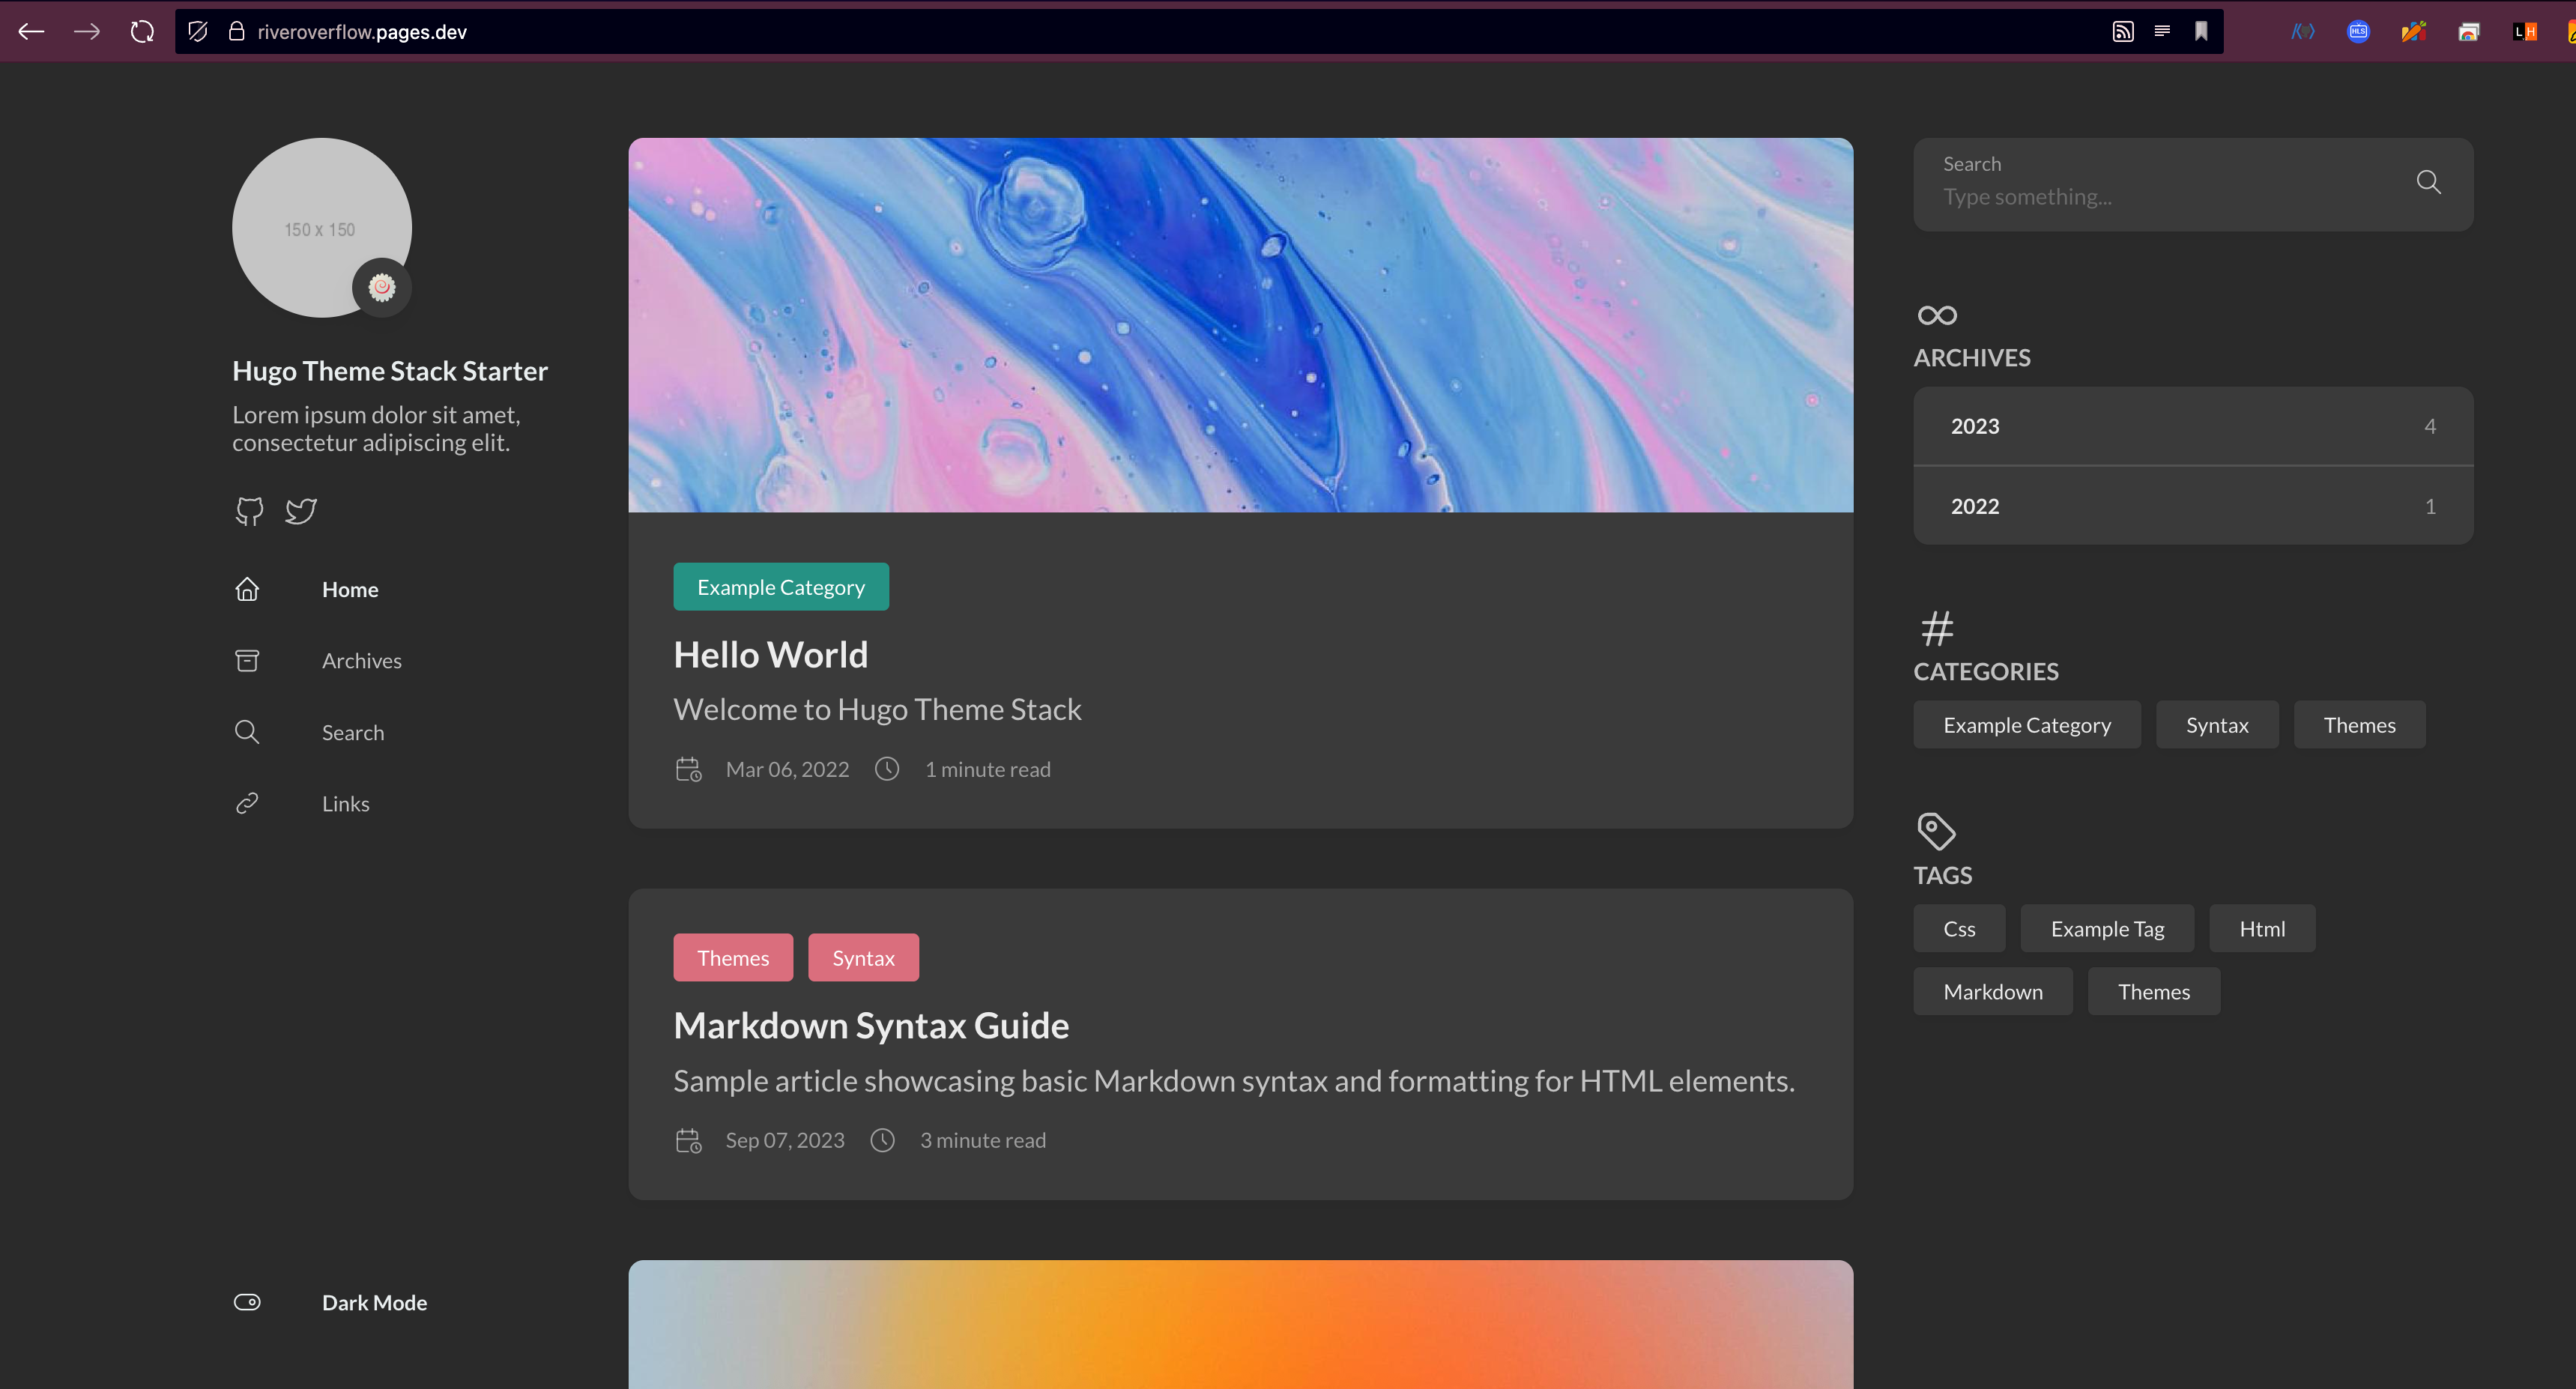
 You can also view this example site here,
Remove GitHub Pages related files, and push your changes.
Also, add .vscode and some unimportant files in .gitignore.
|
|
☁️ Deploy to Cloudflare Pages
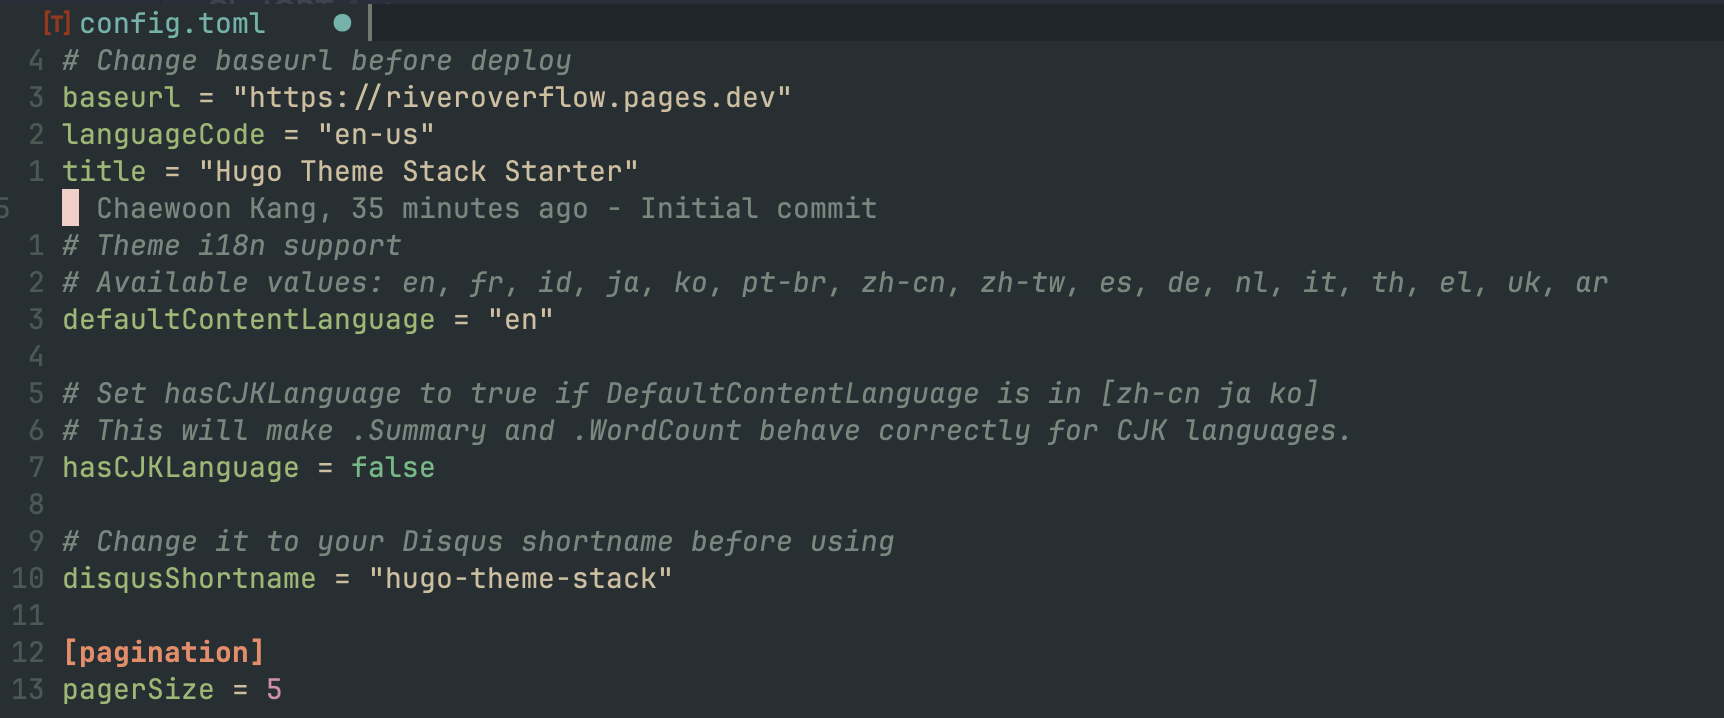
First, we have to change baseURL.
If you don’t change baseURL, your deployed blog might have broken links.
Fix it in config/_default/config.toml.
In Cloudflare Dashboard, Choose Compute(Workers)/Workers & Pages -> Pages.
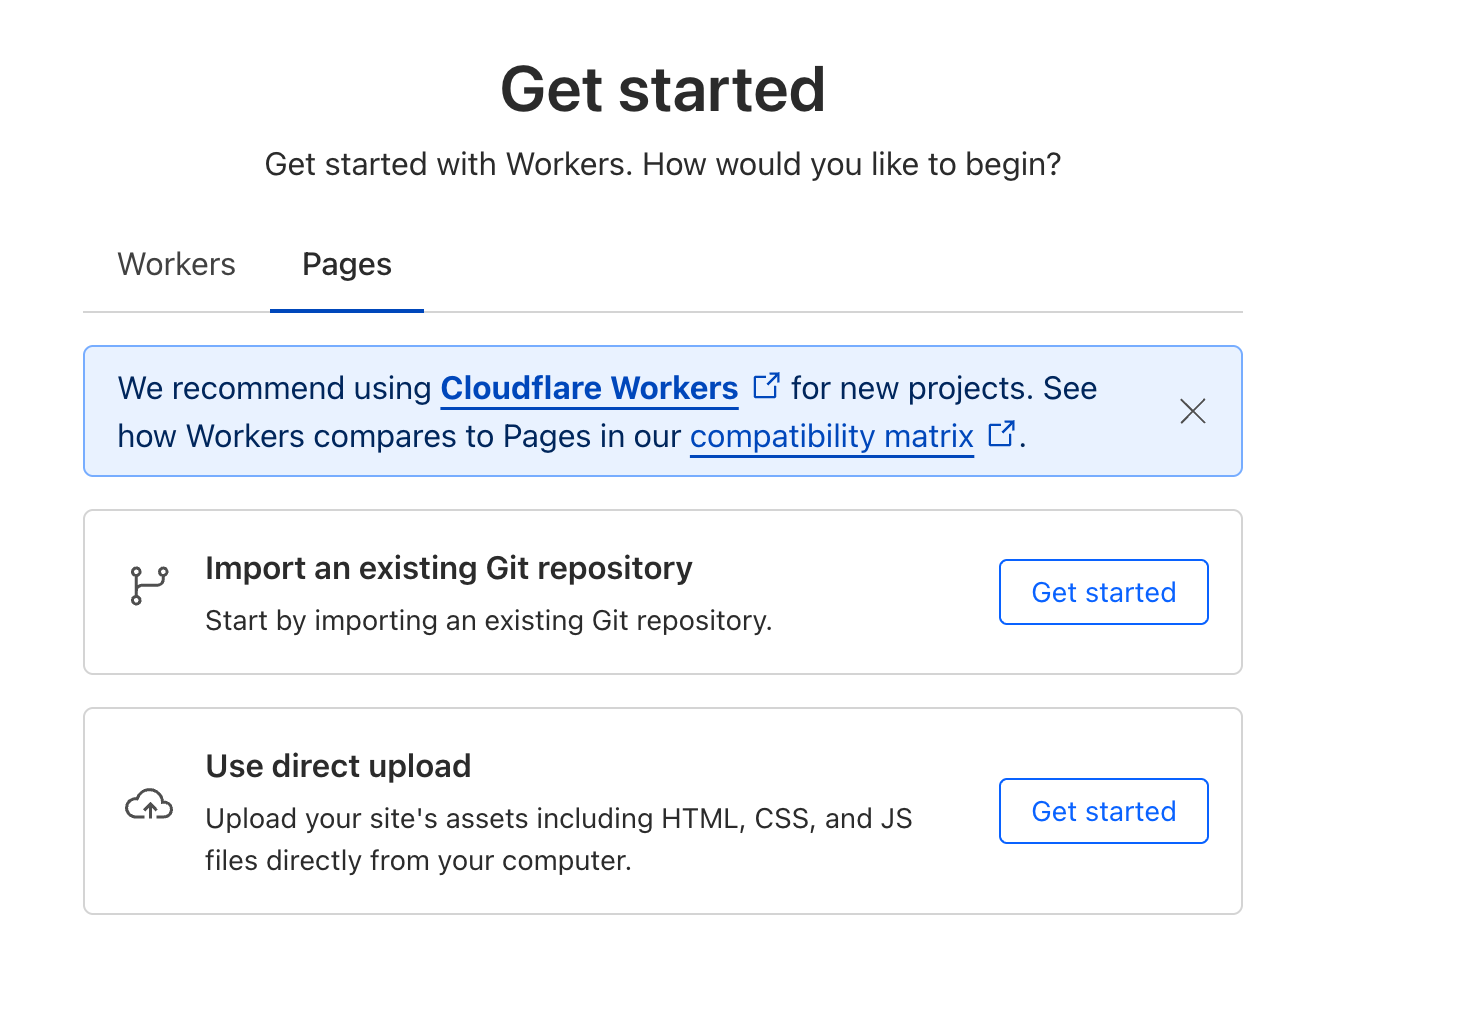
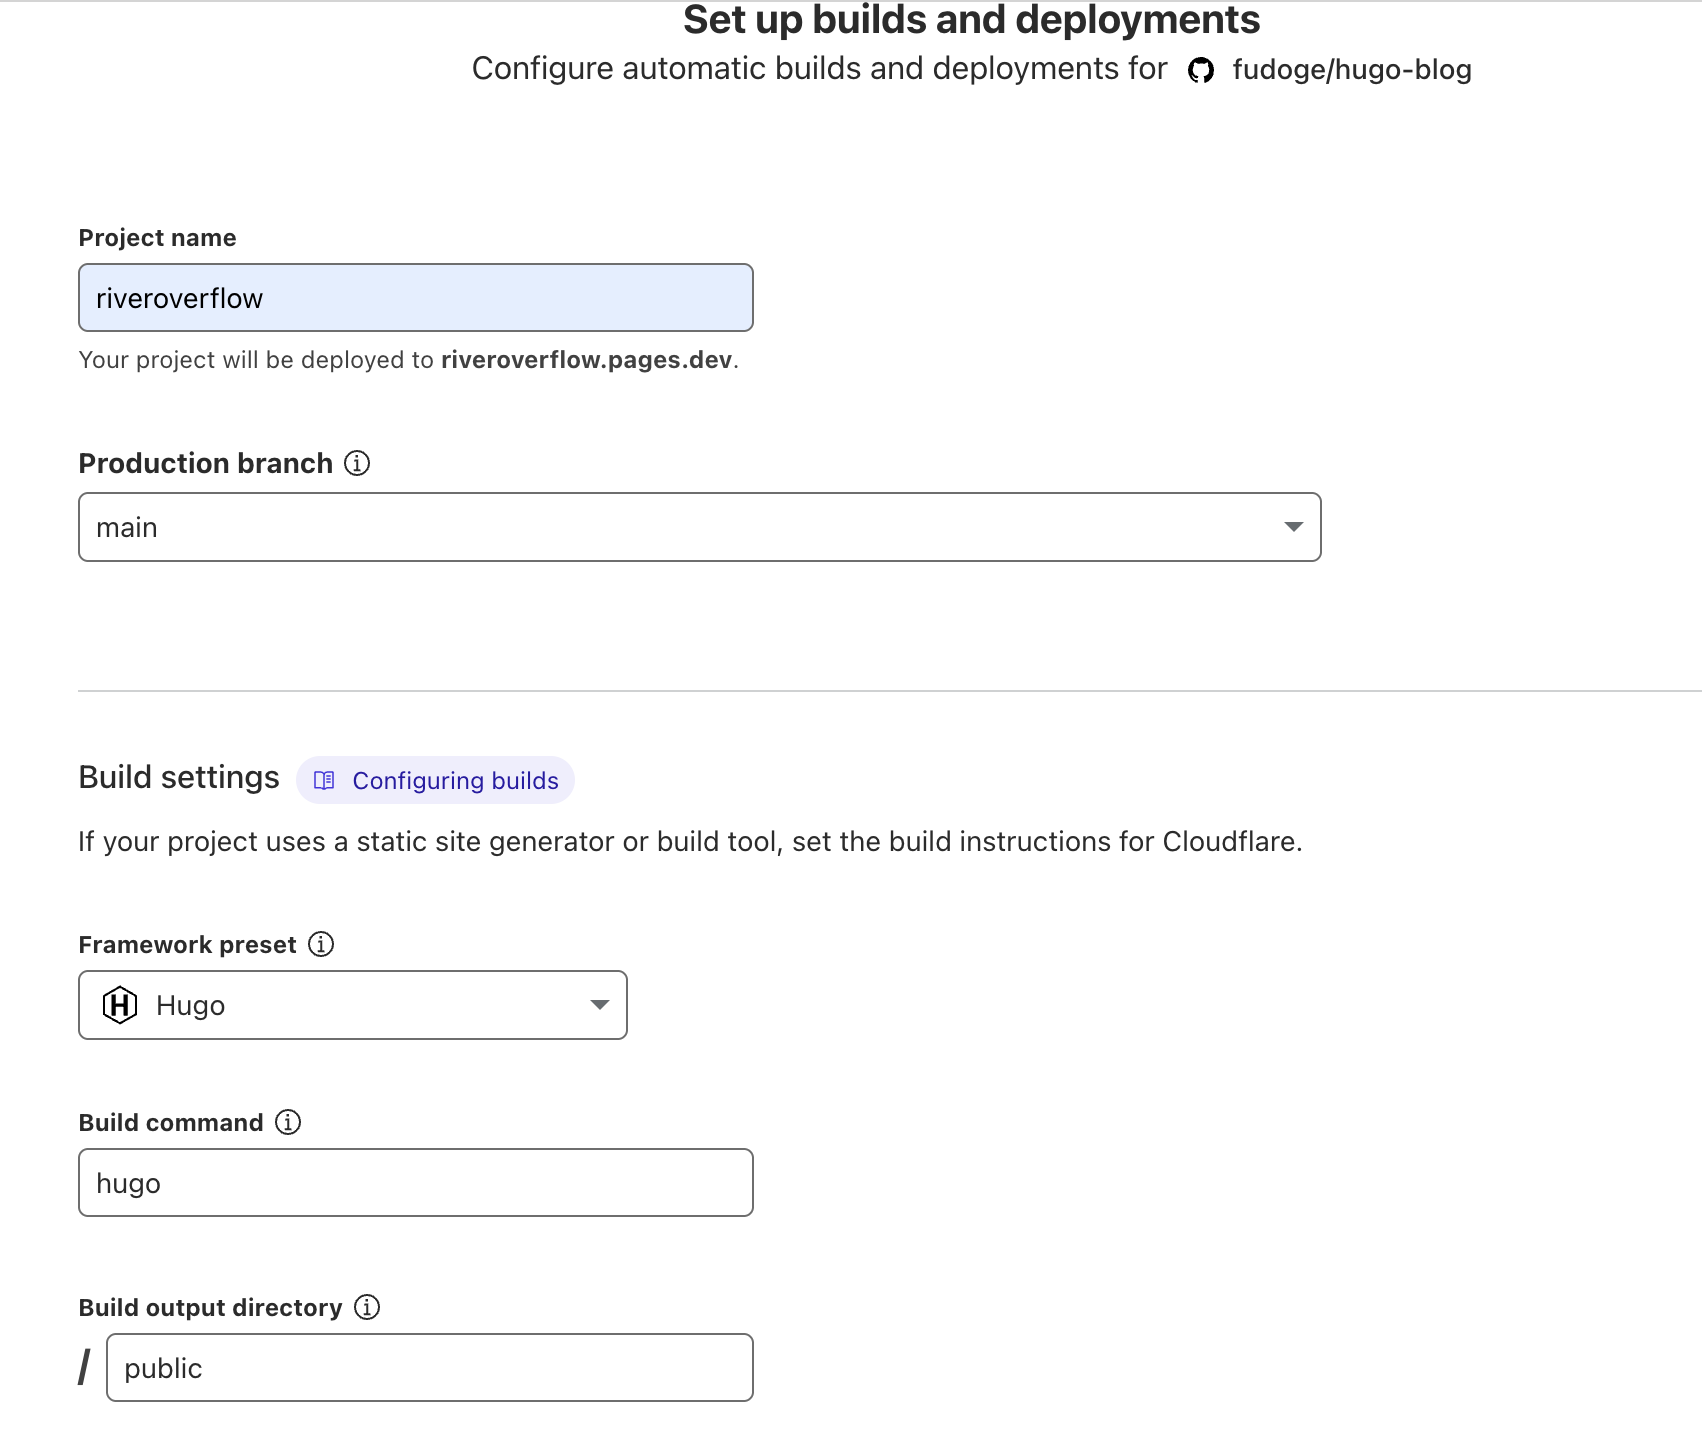
Set your blog’s repository, Project name, branch and build setups.
And Follow the Hugo Template.
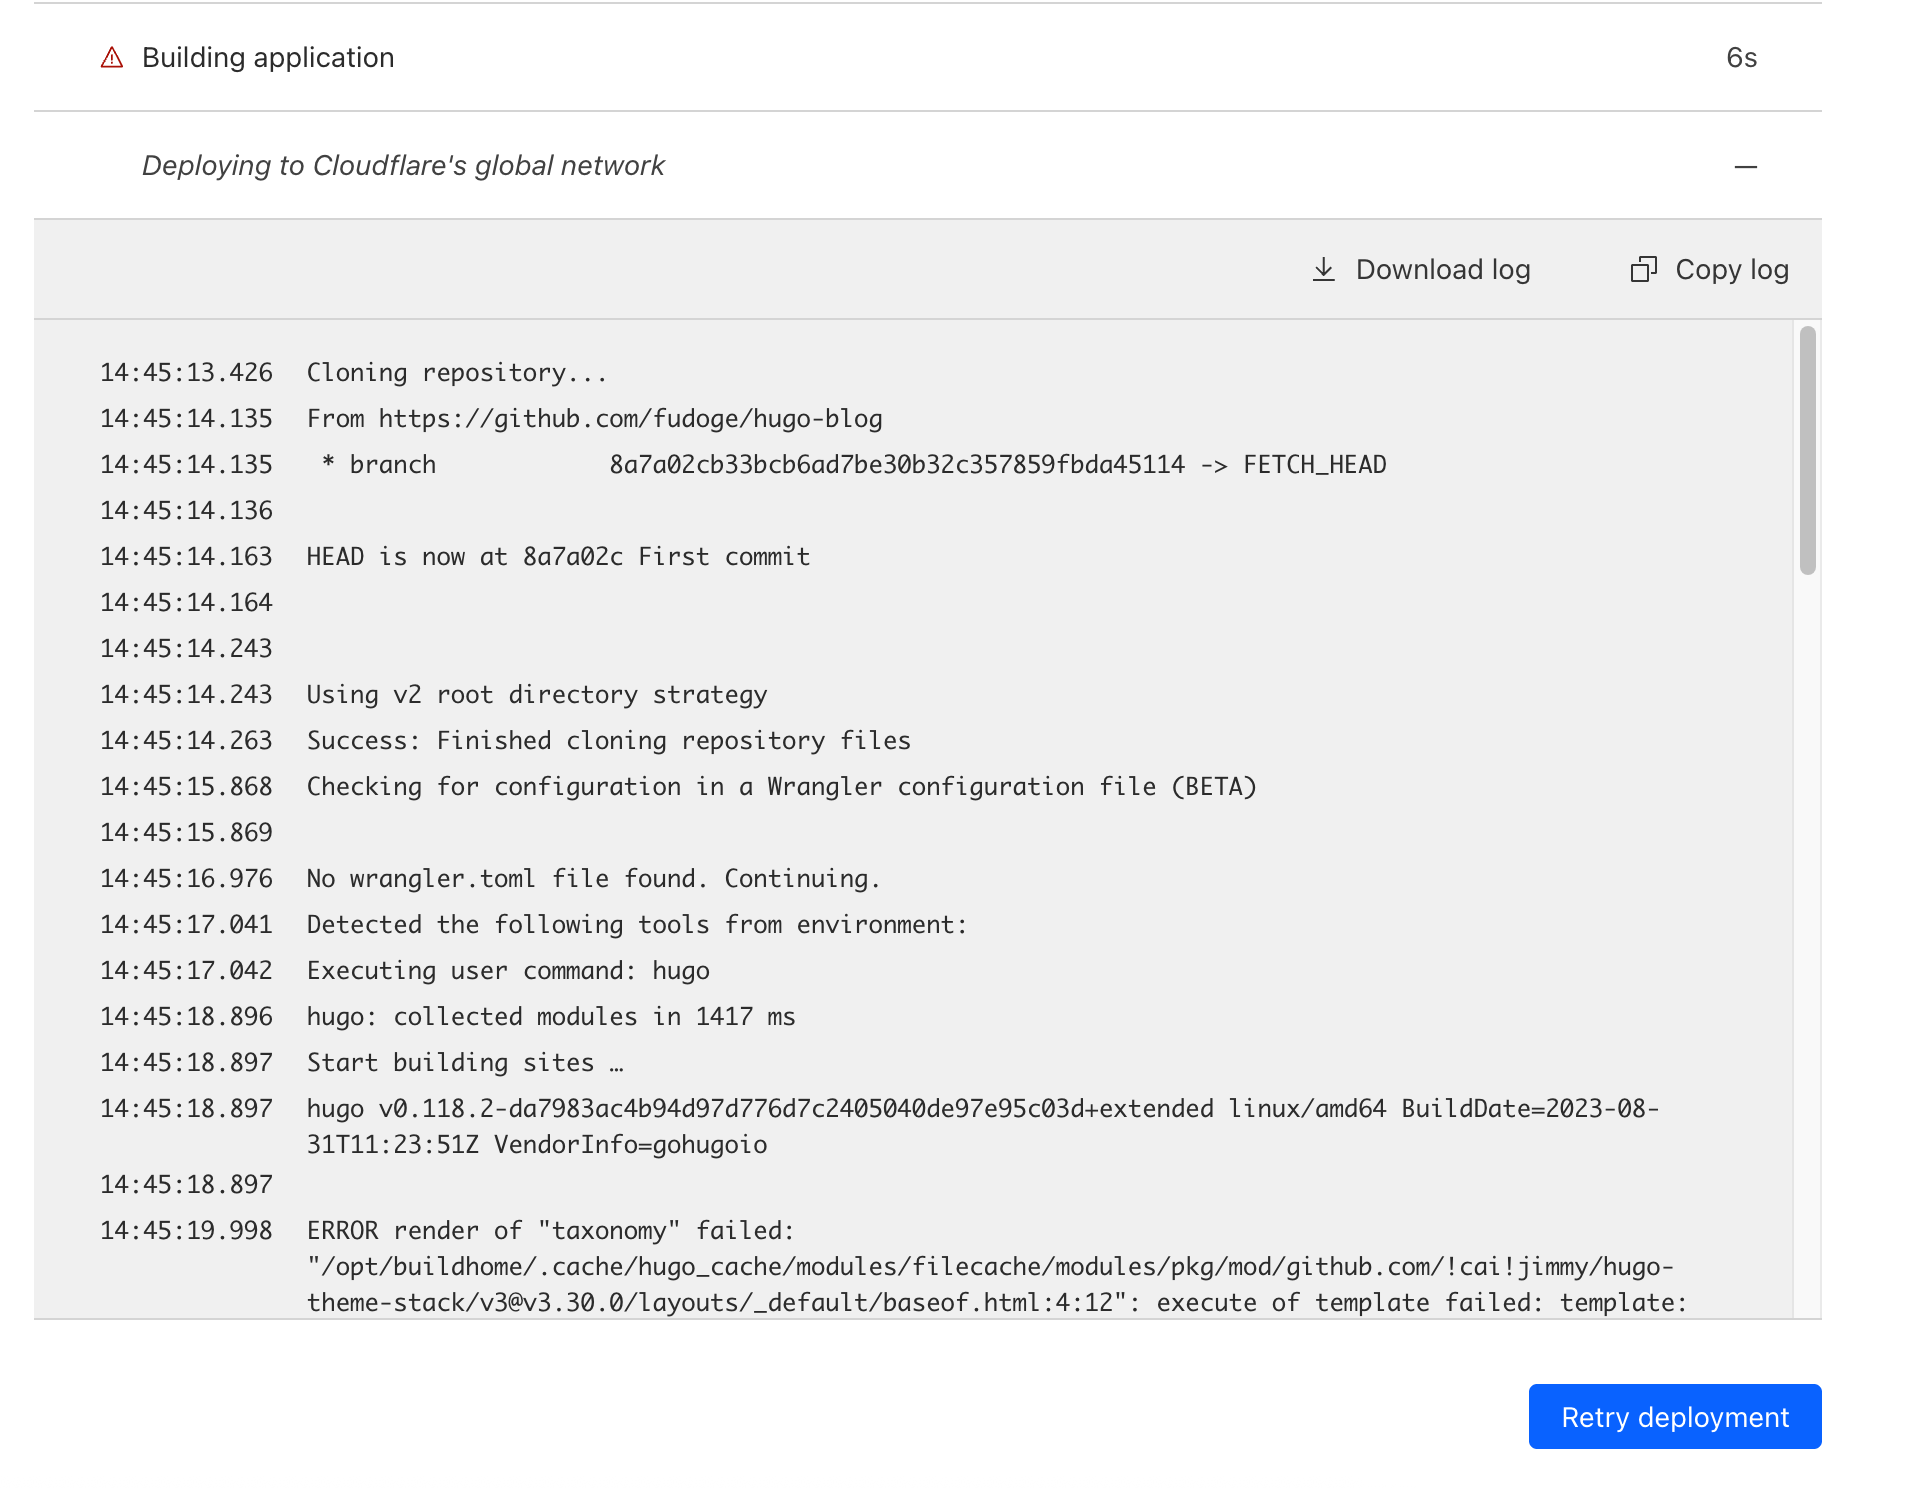
First build would be fail.
Cloudflare Pages may default to older Hugo versions, causing build errors when using newer theme features.
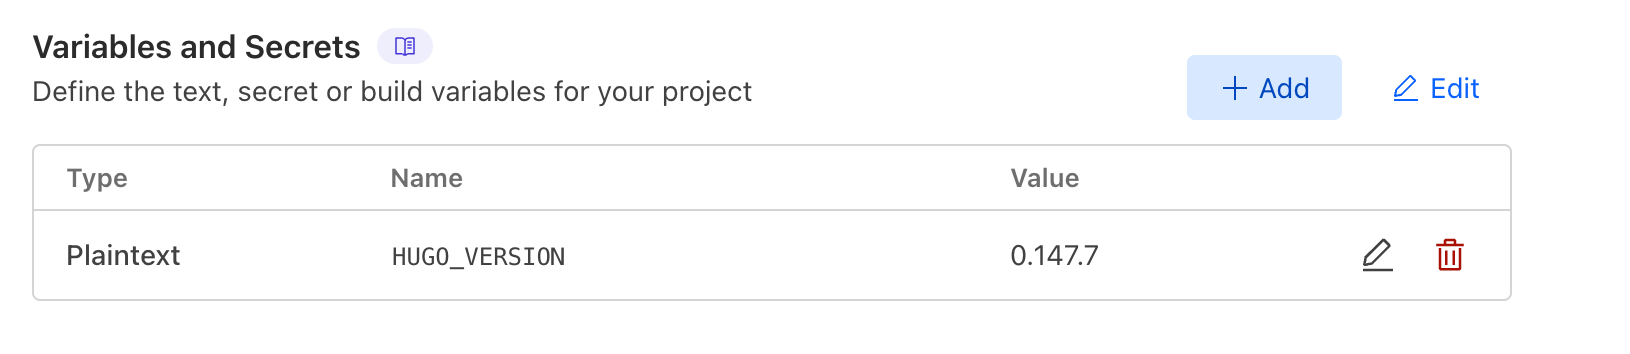
In Settings -> Variables and Secrets, change HUGO_VERSION to your local Hugo version.
You can easily see them in hugo version.
Deploy again. Now, You have your own Hugo blog now!
Feel free to customize your content, update the theme, and start writing awesome posts!